
Weekend Card Making Inspiration 220909
As we head into the weekend, I'm so grateful that I have a full time career that I love.
I'm blessed, but what I really want to tell you about is the sweet little side hustle I have!
I get to create pretty things and they bring joy to others!
What could be better than THAT?!
I know you've heard me say this before, but I'll say it again.
I'm building my forever "job".
My stamping is something that I will always want to do!
It is something that is so relaxing to me.
I never think of it as "selling". I always think of it as sharing.
I think, HOW CAN I HELP someone USE the products they have?
Here's a card idea that should help you use something you have on hand.
My stamping partner Cheryl created this for a recent Card Kit in the Mail!

Let's get the details!
Basics for the Floral Doily Card, created by Cheryl Heiman
Cardbase:
Rich Razzleberry cardstock, 8 1/2" x 5 1/2", folded in half. Decide if you want it to be a side hinge or a top hinge opening card.
This project works EITHER WAY!
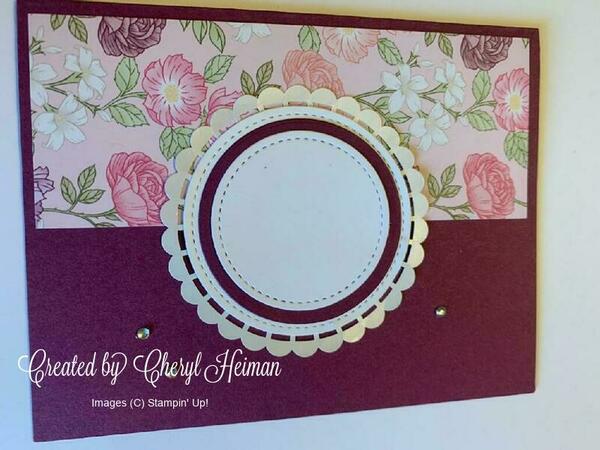
Pretty Paper:
Shown - Wonderful World (retired) paper 2" x 5 1/4" or 5/1/4" x 2" (depending on the pattern on the paper...you might need to decide which direction to cut BEFORE you cut. With the pattern on this paper it doesn't matter.
Greeting tag:
Two Basic White cardstock circles and one from Rich Razzleberry, all die cut with Stitched Shapes Dies
Greeting Accent:
(shown) retired Pearlized Doily, if you don't have doilies, you can create an accent using a scalloped circle in the All That Dies, Layering Circle Dies, wispy circle from the Painted Labels Dies, or use the Country Wreaths Dies.
Embellishments:
Effervescent Elements or any bling you have on hand! Use at least three to accent several areas of your card
Inside card:
Neutral cardstock (Basic White) 4" X 5 1/4" or turn if horizontal, You could add a strip of pretty paper that is 4" x 1/2" or 5 1//4" x 1/2".
Assembly Instructions:
- Fold Base in half (decide on the direction of the cardbase).
- Attach the pretty paper (to the left or top depending on orientation) and use equal space 3 sides.
- Stamp a greeting onto the smallest White circle then layer the circle stack as follows: Doily/scalloped circle, larger white stitched circle, Rich Razzleberry stitched circle, and greeting circle on top. Use adhesive to join the circles together, but use Dimensionals to attach the combined circles to the center of the cardfront.
- Accent the card with your favorite bling! Randomly placing them around the card front.
Use the supplies you have on hand!
You can be inspired by this card even if you don't have the exact supplies!
We'd LOVE to see your version of the card! Please post a photo on our Facebook page using the HASHTAG #WCMI9.
Use a different paper. Use a die cut item instead of the doily!
Be inspired! No need to MAKE THE EXACT CARD!
Make a card! Send a card! Make someone's day!