
Weekend Card Making Inspiration - Dry Brush Metallic
Let me share a gorgeous card with idea with you this weekend!
It was designed by my stamping partner Cheryl and I'm showing two orientations and a step up option.

Project Basics:
Cardbase: Soft Succulent 8 1/2" x 5 1/2"
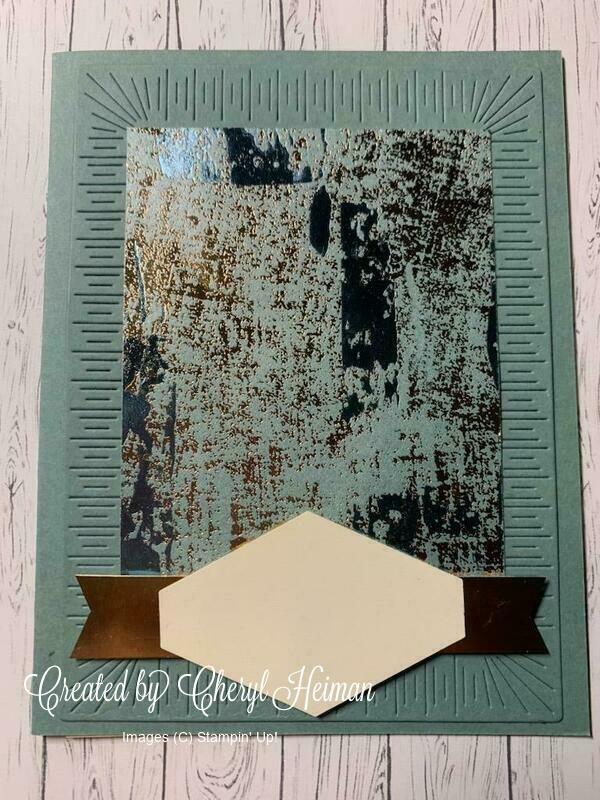
Embossed cs layer: 5 1/4" x 4" Soft Succulent as shown embossed with the Radiating Stitches Dies, but you could use your favorite embossing folder
Accent Layer: Foil - 4 1/4" x 3 1/4" (gold, rose gold) as shown Copper
Pretty Paper piece : (Dry Brushed Metallic) 4 " x 3"
Banner Accent: Foil - 3 3/4 " x 3/4" (gold, rose gold). as shown Copper
Note: Can be cut out of the center of the accent layer, (use the Tailored Tag punch to make banner ends)
Greeting tag: Very Vanilla - size determined by punch or die used. As shown punched with Tailored Tag punch
Optional: Inside layer Very Vanilla - 5 1/4" x 4"
Fold your cardbase in half. Determine your card orientation. Turn to make a top fold card or could be turned to be a left hinge fold.
After embossing the accent layer, center and attach it to the cardbase.
Center and attach the pretty paper to the foil accent layer (if using), then center and attach this combined layer to the embossed cardstock layer.
Stamp a greeting onto the neutral cardstock and punch with the Tailored Tag.
Attach greeting directly to prepared foil banner.
Attached combined greeting tag in the location and orientation you’d like using Dimensionals.
Optional: Choose the appropriate orientation and stamp a greeting onto the 4” x 5.25” piece of Vanilla cardstock. Center and attach inside the card.
Here are the tools you'll need to have on hand: